Restore the system image
1. Log in to the Web-interface
Log in to the Web interface using your login and password. Instructions for working with the Web interface are available at link. Make sure that the system images are available by going to the Backups section and making sure that the Images section contains the created system images.
Backups section
2. Preparing to restore the system from an image created with Urbackup
In our example, we will restore Windows server 2012r2 installed on a virtual machine, if you have a physical server or PC, the procedure will be the same.
2.1. Downloading a disk to restore the system from an image
First, you need to download the iso image of the disk to restore the system from the image created with Urbackup. To download the recovery disk, follow this link:
2.2. Write the iso image to a disk or USB flash drive.
Burn the iso image to a disk or write USB flash drive, to write the iso image on USB flash drive from Windows you can use the program Rufus.
3. Restore the system from an image created with Urbackup
3.1. Configure the boot priority in the Bios
Insert the disk into the CD drive of your server or PC on which you will restore the image, or connect the USB flash drive to a free USB port on your server/PC. Go to the Bios or Uefi and set the boot priority so that the USB flash drive boots first.
3.2. Booting the server from a flash drive/disk
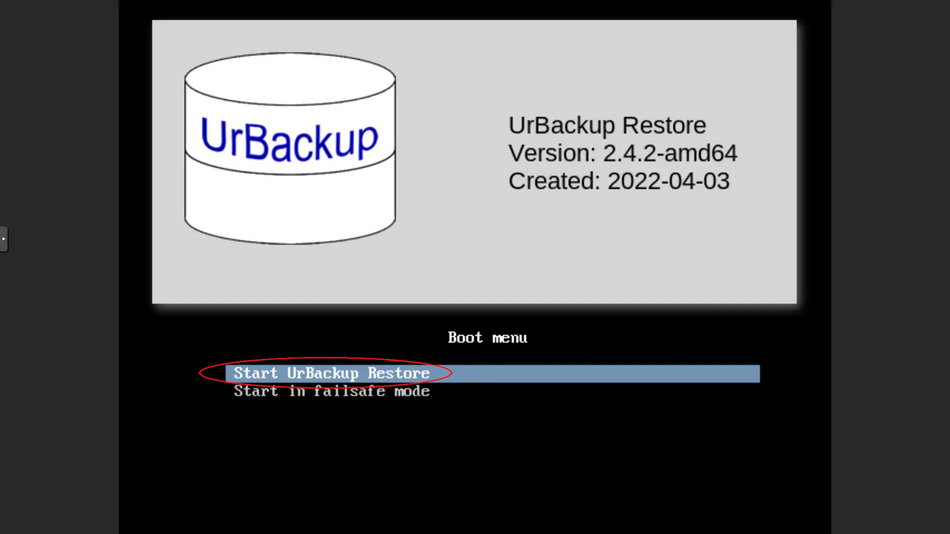
After booting your server/PC from a flash drive or disk, you should see the Urbackup menu. In the menu, select "Start UrBackup Restore" and press Enter.
Urbackup menu
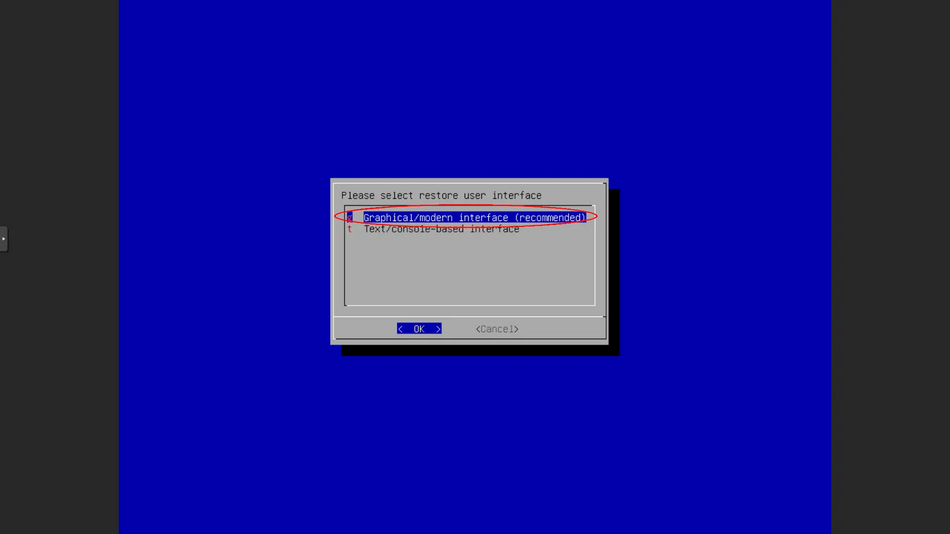
Wait for the system to boot and in the window that appears, select "Graphical/modern interface (recommended)" and press Enter.
Graphical/modern interface (recomended)
3.3 Network settings
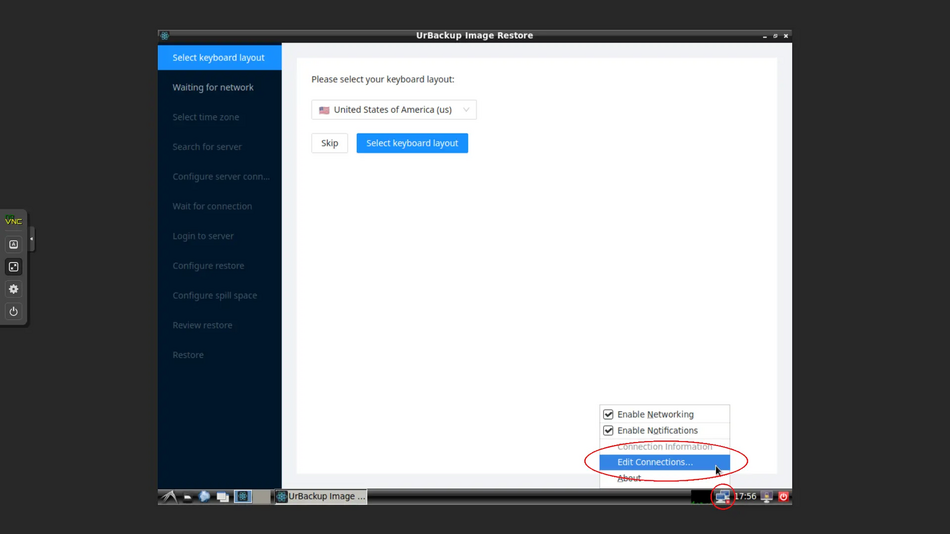
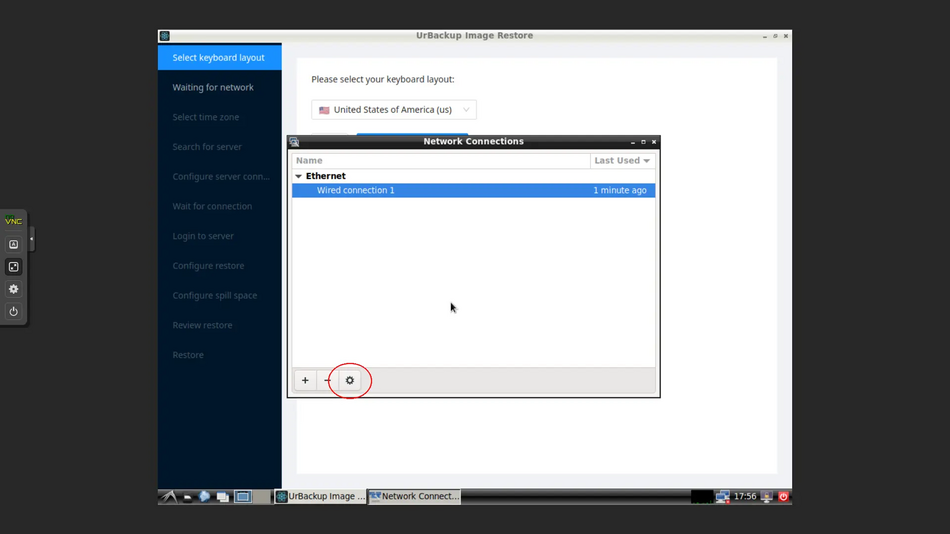
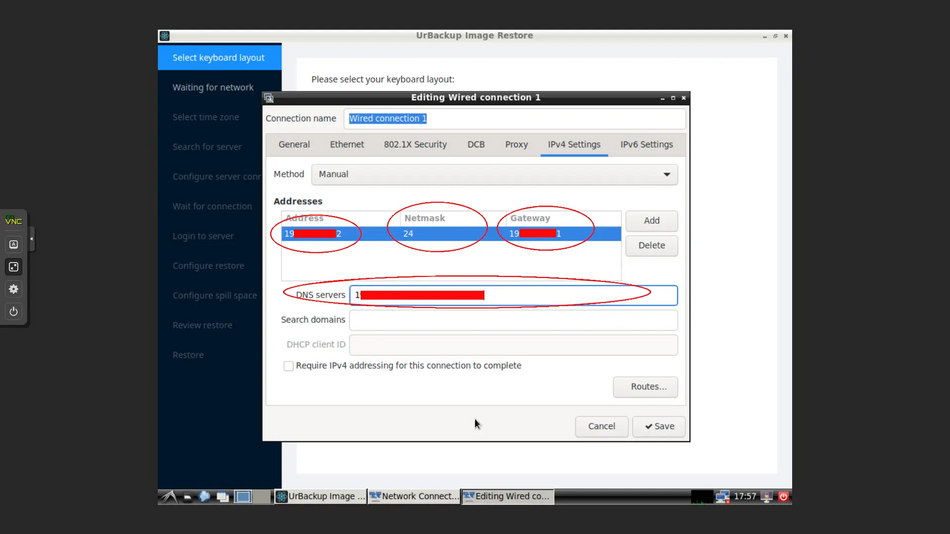
After the system is fully booted from the flash drive/disk, you must first configure the network, because the system will be restored from the image via the Internet. If your network is configured to receive settings via DHCP, skip this step and go to the next one. If you have static settings, you must configure the network manually. To do this, right-click on the network icon in the right corner and select "Edit Connections". In the window that opens, select "Wired connection 1" and click on the gear icon, go to the "IPv4 Settings" tab, select "Manual" in the "Method" section and enter the network settings. Click "Save" to save the settings.
Setting up a network
3.4. Connecting to the Urbackup backup server
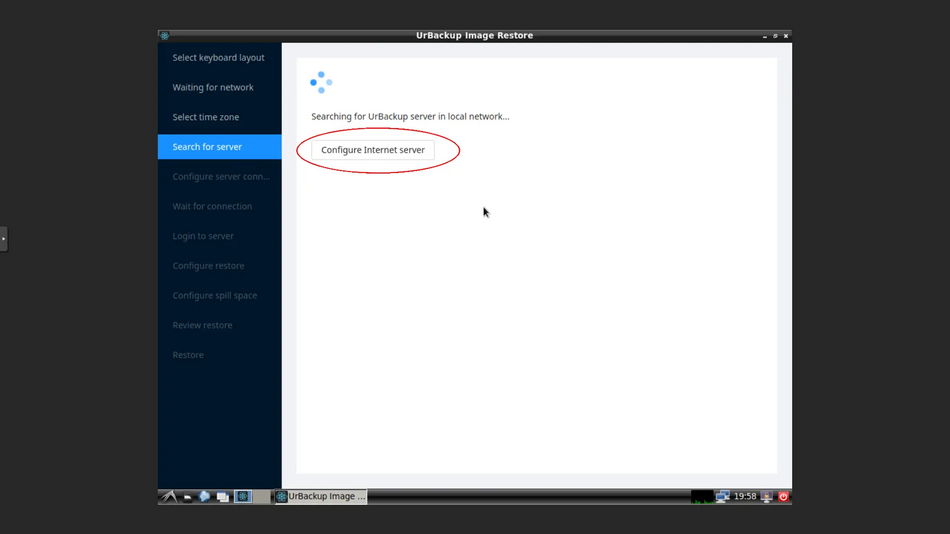
In the "Search for server" section, select "Configure Internet server"
Setting up an Internet server
3.5. Enter the data to connect to the Urbackup backup server
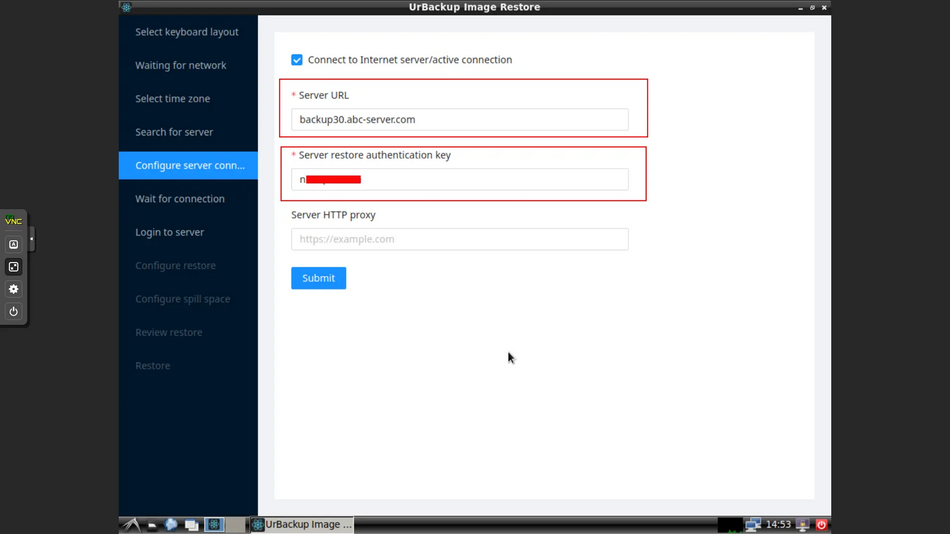
In the "Configure server connection" section, enter the data for connecting to the backup server. You should have received the connection data when you ordered the backup service. If you do not have an email with the connection data, you can find it by reading our instructions for ordering the service backup. In the "Server URL" section, enter the server name, in the "Server restore authentication key" section, enter the restore key, and click "Submit".
Configure server connection
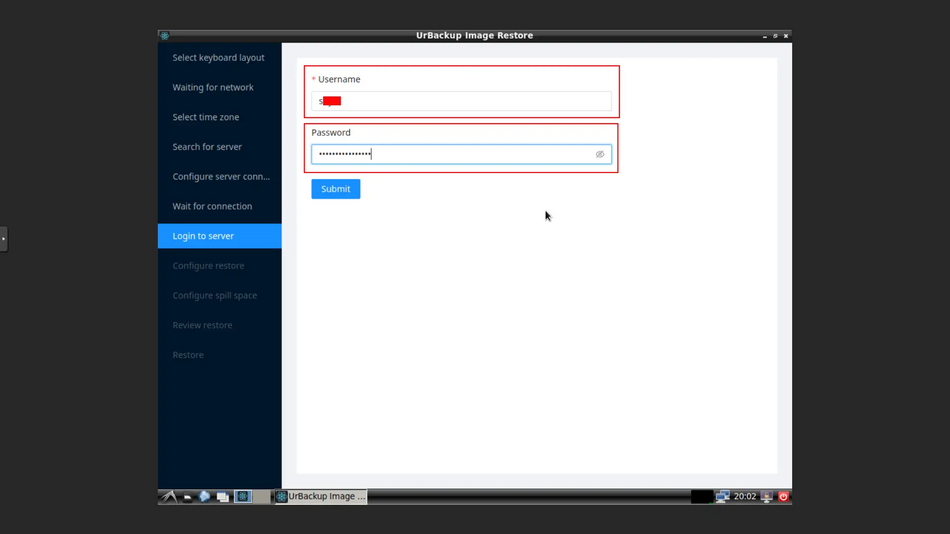
3.6. Enter the username and password for the backup server
In the "Login to server" section, enter your username and password, which you can also find out from the email message after ordering the backup service. Click "Submit" to confirm.
Username and password
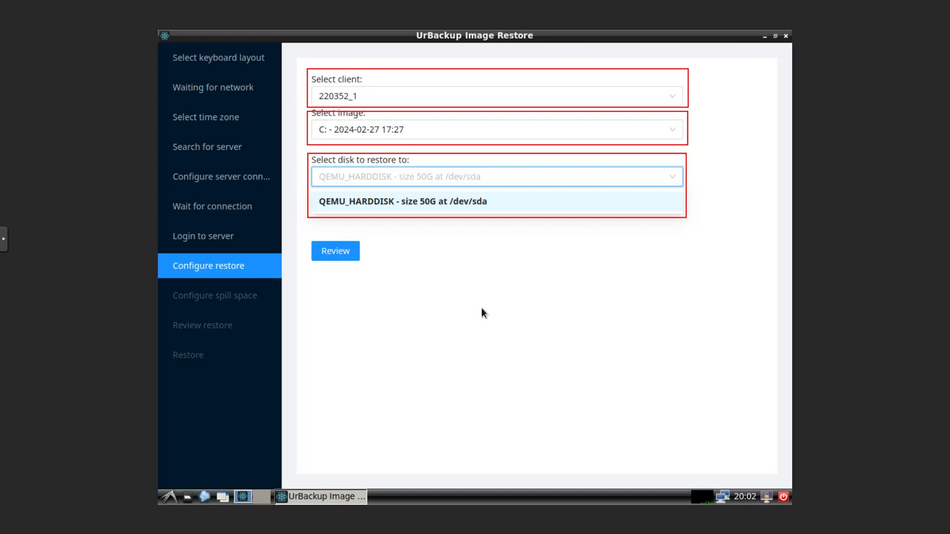
3.7. Configure restore
In "Select client", select the client you want to restore, in "Select image", select the backup you want to restore, in "Select disk to restore to", select your disk to which you want to restore the backup. Click "Review" to confirm.
Configure restore
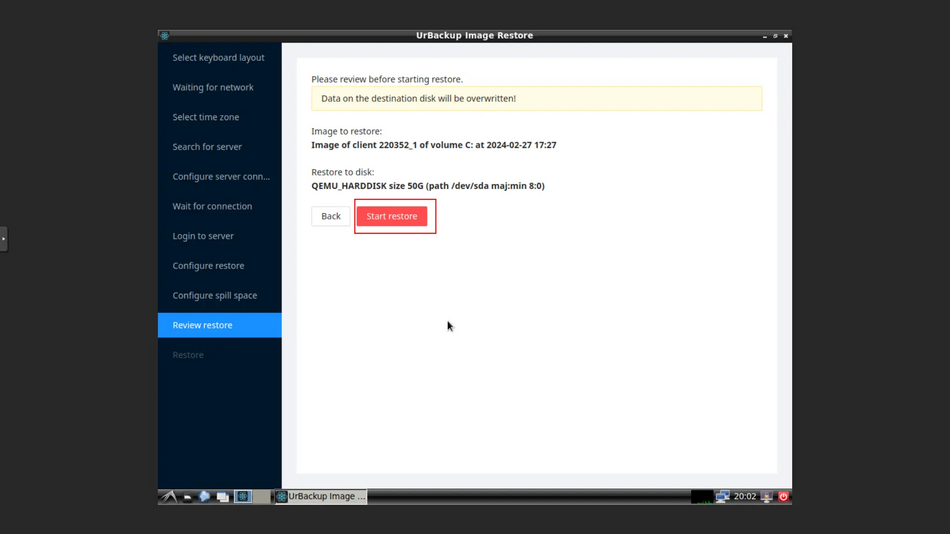
3.8. Confirmation of system image recovery
Confirm the system recovery from the image by clicking "Start restore" and wait until the system is fully restored.
Confirmation of system recovery from an image
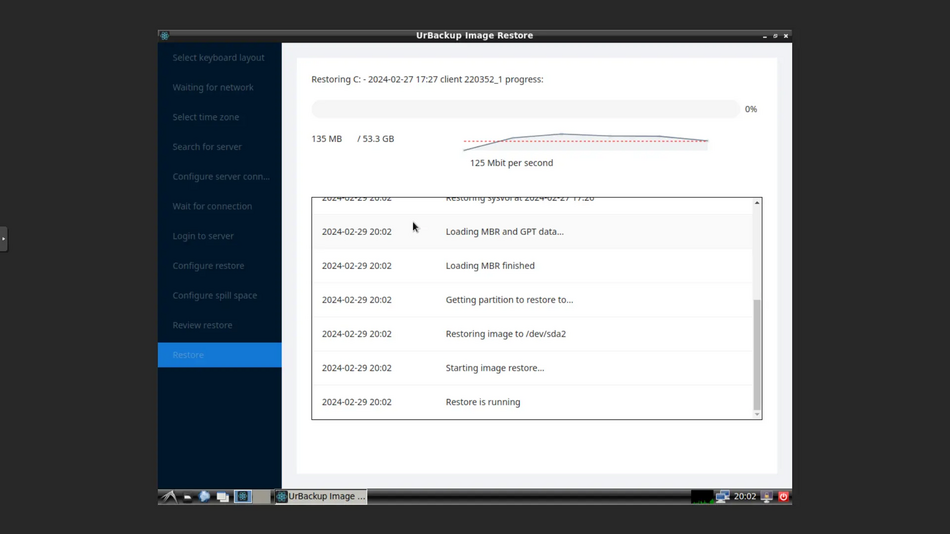
System recovery process
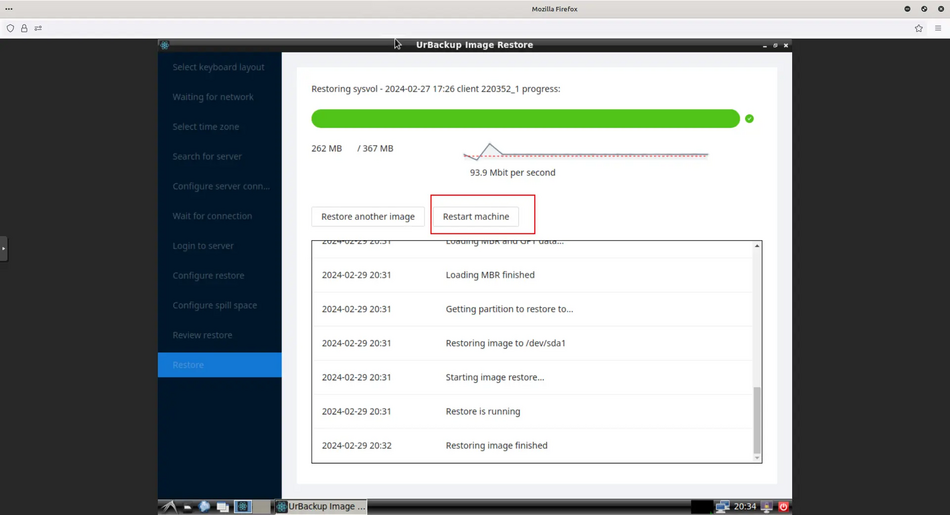
3.9. Restart your server or PC
Reboot your server or PC after successful image recovery by clicking "Restore machine" and remove the USB flash drive/CD from the server.
Перезавантажте ваш сервер або ПК
