Налаштування клієнта Urbackup/en: відмінності між версіями
Admin (обговорення | внесок) Створена сторінка: [https://nextcloud.abc-server.com/index.php/s/HbPmA8Ctn9WsTRd Download the Urbackup client] |
Admin (обговорення | внесок) Немає опису редагування |
||
| (Не показано 33 проміжні версії 2 користувачів) | |||
| Рядок 1: | Рядок 1: | ||
<languages/> | <languages/> | ||
<!--T:61--> | |||
{{#seo: | |||
|title=Setting up the Urbackup client | ABC-SERVER.COM | |||
|title_mode=append | |||
|keywords=setup Urbackup client, setting up the Urbackup client, data backup | |||
|description=Setting up the Urbackup client | |||
}} | |||
| Рядок 21: | Рядок 28: | ||
<div style="font-size: 18px;"> | <div style="font-size: 18px;"> | ||
<p> | <p> | ||
2. Installing the client on the server/PC | |||
2. | |||
</p> | </p> | ||
</div> | </div> | ||
| Рядок 29: | Рядок 34: | ||
<p> | <p> | ||
<!--T:4--> | <!--T:4--> | ||
After downloading the Urbackup client to your server or PC, run the msi package and click "Next" to install it. | |||
</p> | |||
<font color="#FF0000"> | |||
<p> | |||
<!--T:63--> | |||
Important! Before installing the Urbackup client on Windows 8/8.1 or Windows server 2012/2012r2, you must first install all updates from the Windows Update Center, and only then install the Urbackup client. | |||
</p> | </p> | ||
</font> | |||
| Рядок 38: | Рядок 47: | ||
<p> | <p> | ||
<!--T:6--> | <!--T:6--> | ||
Urbackup client installation window | |||
</p> | </p> | ||
</div> | </div> | ||
<p> | <p> | ||
<!--T:8--> | <!--T:8--> | ||
[[File:urbackup_client1_en.webp|alt=Installing the Urbackup backup client |center|thumb|950px]] | |||
[[File: | |||
</p> | </p> | ||
| Рядок 54: | Рядок 59: | ||
<p> | <p> | ||
<!--T:10--> | <!--T:10--> | ||
The window of successful installation of the Urbackup client | |||
</p> | </p> | ||
</div> | </div> | ||
<p> | <p> | ||
<!--T:12--> | <!--T:12--> | ||
[[File:urbackup_client2_en.webp|alt=Successfully installing the Urbackup backup client |center|thumb|950px]] | |||
[[File: | |||
</p> | </p> | ||
| Рядок 69: | Рядок 70: | ||
<div style="font-size: 18px;"> | <div style="font-size: 18px;"> | ||
<p> | <p> | ||
3. Settings | |||
3. | |||
</p> | </p> | ||
</div> | </div> | ||
| Рядок 77: | Рядок 76: | ||
<p> | <p> | ||
<!--T:14--> | <!--T:14--> | ||
After ordering the backup service, you should have received a setup email where you can find the information you need to configure the Urbackup client. | |||
</p> | </p> | ||
| Рядок 85: | Рядок 82: | ||
<p> | <p> | ||
<!--T:16--> | <!--T:16--> | ||
[[File:urbackup_client13_en.webp|alt=Data to connect to the Urbackup server |center|thumb|950px]] | |||
[[File: | |||
</p> | </p> | ||
| Рядок 93: | Рядок 88: | ||
<p> | <p> | ||
<!--T:18--> | <!--T:18--> | ||
After installing the client, it should appear in the Windows system tray. | |||
</p> | </p> | ||
| Рядок 101: | Рядок 94: | ||
<p> | <p> | ||
<!--T:20--> | <!--T:20--> | ||
[[File:urbackup_client3_en.webp|alt=Client Urbackup settings |center|thumb|950px]] | |||
[[File: | |||
</p> | </p> | ||
| Рядок 109: | Рядок 100: | ||
<p> | <p> | ||
<!--T:22--> | <!--T:22--> | ||
Right-click on the Urbackup client icon and select "Settings". | |||
</p> | </p> | ||
<p> | <p> | ||
<!--T:24--> | <!--T:24--> | ||
In the window that opens, go to the "Client" section and enter the computer name that we can find in the message we received in the mail. | |||
</p> | </p> | ||
| Рядок 124: | Рядок 111: | ||
<p> | <p> | ||
<!--T:26--> | <!--T:26--> | ||
Client section | |||
</p> | </p> | ||
</div> | </div> | ||
<p> | <p> | ||
<!--T:28--> | <!--T:28--> | ||
[[File:urbackup_client4_en.webp|alt=Setting up the Urbackup client section |center|thumb|950px]] | |||
[[File: | |||
</p> | </p> | ||
| Рядок 139: | Рядок 122: | ||
<p> | <p> | ||
<!--T:30--> | <!--T:30--> | ||
After entering the computer name, go to the "Internet" section. Check the box "Enable backup via Internet", in the "Server URL client connects to:" section, enter the server name that you can find in the email message, in the "Server" section. In the "Internet server password" section, enter the password that you can find in the "Authorization key" section of the email message. | |||
</p> | </p> | ||
| Рядок 148: | Рядок 129: | ||
<p> | <p> | ||
<!--T:32--> | <!--T:32--> | ||
Internet section | |||
</p> | </p> | ||
</div> | </div> | ||
<p> | <p> | ||
<!--T:34--> | <!--T:34--> | ||
[[File:urbackup_client5_en.webp|alt=Setting up the Internet section of the Urbackup client |center|thumb|950px]] | |||
[[File: | |||
</p> | </p> | ||
| Рядок 163: | Рядок 140: | ||
<p> | <p> | ||
<!--T:36--> | <!--T:36--> | ||
Check that we have entered everything correctly in the Client and Internet sections and click Ok. Wait for 5-10 minutes. In the Windows system tray, double-click on the Urbackup client icon to check the connection status. | |||
</p> | </p> | ||
| Рядок 172: | Рядок 147: | ||
<p> | <p> | ||
<!--T:38--> | <!--T:38--> | ||
Status window | |||
</p> | </p> | ||
</div> | </div> | ||
<p> | <p> | ||
<!--T:40--> | <!--T:40--> | ||
[[File:urbackup_client6_en.webp|alt=The Urbackup client status window |center|thumb|950px]] | |||
[[File: | |||
</p> | </p> | ||
| Рядок 188: | Рядок 159: | ||
<p> | <p> | ||
<!--T:42--> | <!--T:42--> | ||
Status window when creating a full system image | |||
</p> | </p> | ||
</div> | </div> | ||
<p> | <p> | ||
<!--T:44--> | <!--T:44--> | ||
[[File:urbackup_client7_en.webp|alt=The Urbackup client status window during backup creation |center|thumb|950px]] | |||
[[File: | |||
</p> | </p> | ||
| Рядок 203: | Рядок 170: | ||
<div style="font-size: 18px;"> | <div style="font-size: 18px;"> | ||
<p> | <p> | ||
4. Web interface | |||
4. Web | |||
</p> | </p> | ||
</div> | </div> | ||
<p> | <p> | ||
<!--T:47--> | <!--T:47--> | ||
You can also access the Web interface, where you can: check the online status of your server (whether you have configured the Urbackup client correctly), start a file backup or create a C drive image, see if the backup is running now, and restore files through the Web interface. To connect to the Web interface, enter the domain name in the address bar of your browser, which you can find in the "Server" section of the email message, and you will be able to find the username and password there. | |||
</p> | </p> | ||
| Рядок 219: | Рядок 182: | ||
<p> | <p> | ||
<!--T:49--> | <!--T:49--> | ||
Status window | |||
</p> | </p> | ||
</div> | </div> | ||
<p> | <p> | ||
<!--T:51--> | <!--T:51--> | ||
[[File:urbackup_client8_en.webp|alt=Web interface status window |center|thumb|950px]] | |||
[[File: | |||
</p> | </p> | ||
| Рядок 235: | Рядок 194: | ||
<p> | <p> | ||
<!--T:53--> | <!--T:53--> | ||
Activity window | |||
</p> | </p> | ||
</div> | </div> | ||
<p> | <p> | ||
<!--T:55--> | <!--T:55--> | ||
[[File:urbackup_client9_en.webp|alt=Web interface activity window |center|thumb|950px]] | |||
[[File: | |||
</p> | </p> | ||
Поточна версія на 17:46, 15 березня 2024
1. Download the Urbackup client
Urbackup backup is a client-server solution, so you first need to download the client to install on your server or PC. To download the Urbackup client, follow this link:
2. Installing the client on the server/PC
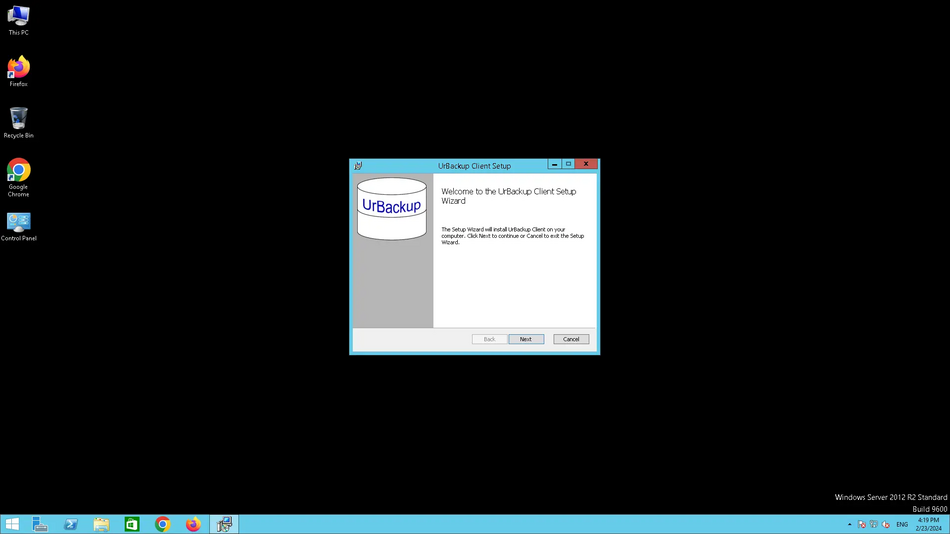
After downloading the Urbackup client to your server or PC, run the msi package and click "Next" to install it.
Important! Before installing the Urbackup client on Windows 8/8.1 or Windows server 2012/2012r2, you must first install all updates from the Windows Update Center, and only then install the Urbackup client.
Urbackup client installation window
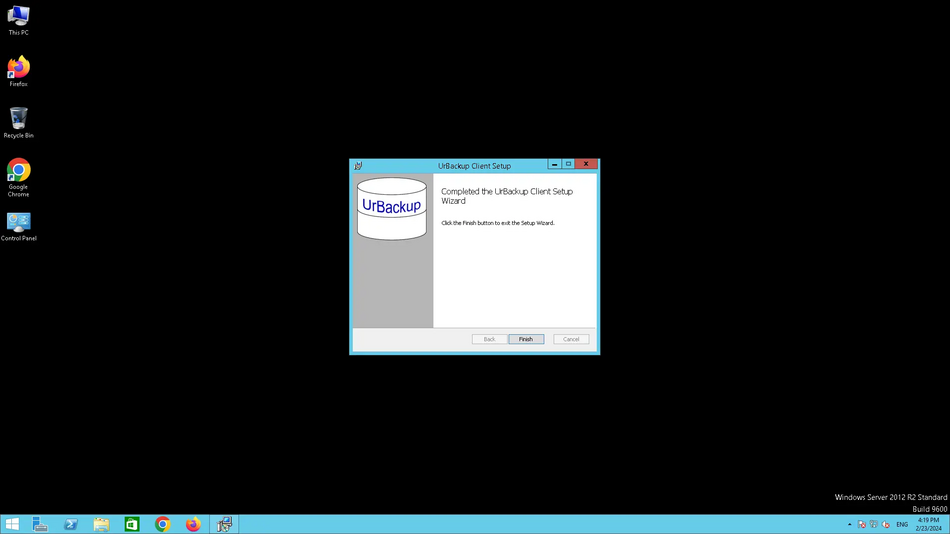
The window of successful installation of the Urbackup client
3. Settings
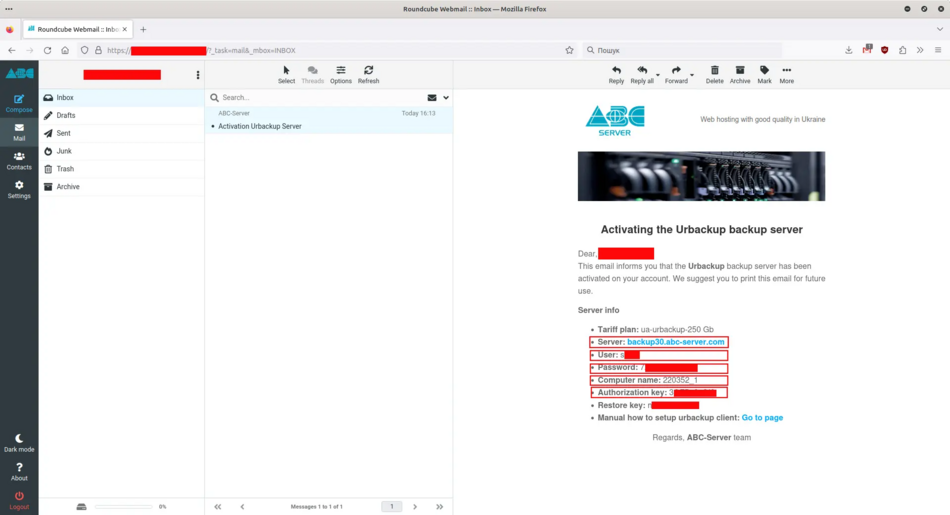
After ordering the backup service, you should have received a setup email where you can find the information you need to configure the Urbackup client.
After installing the client, it should appear in the Windows system tray.
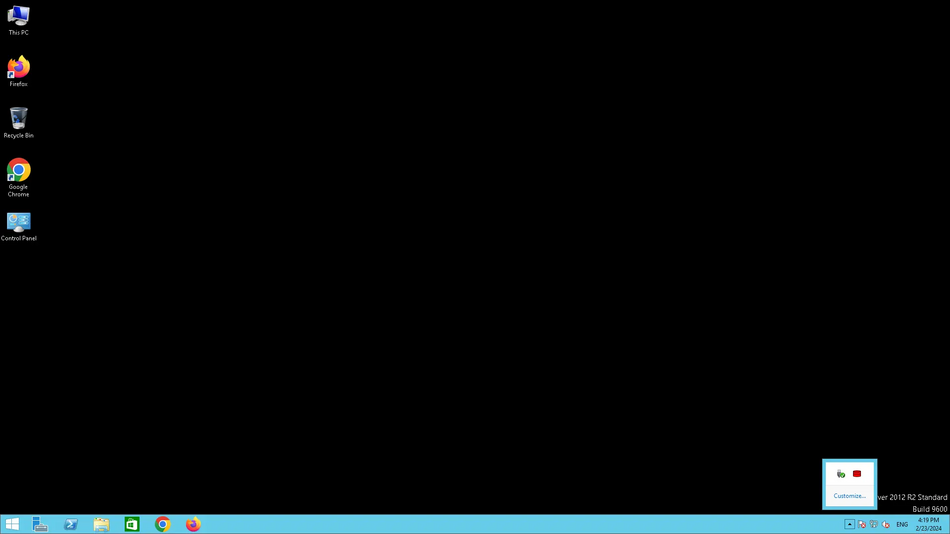
Right-click on the Urbackup client icon and select "Settings".
In the window that opens, go to the "Client" section and enter the computer name that we can find in the message we received in the mail.
Client section
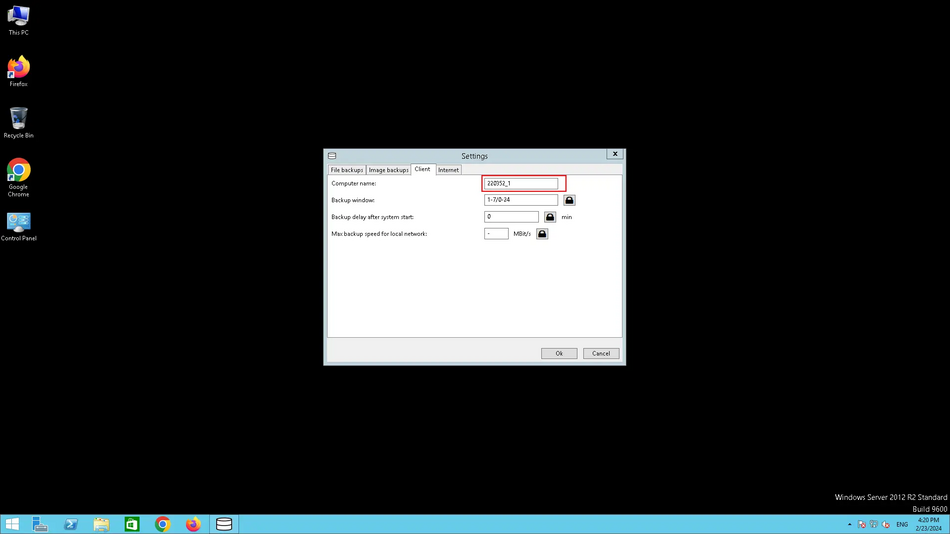
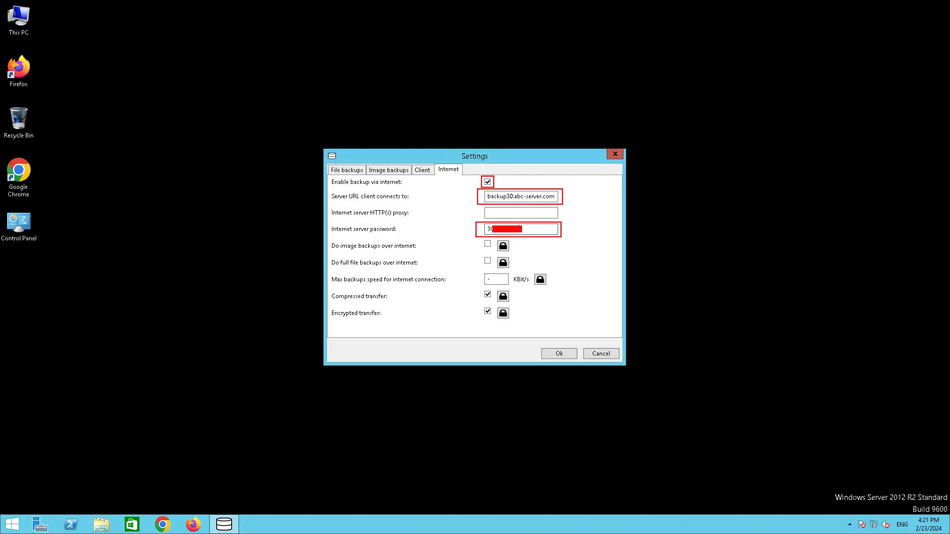
After entering the computer name, go to the "Internet" section. Check the box "Enable backup via Internet", in the "Server URL client connects to:" section, enter the server name that you can find in the email message, in the "Server" section. In the "Internet server password" section, enter the password that you can find in the "Authorization key" section of the email message.
Internet section
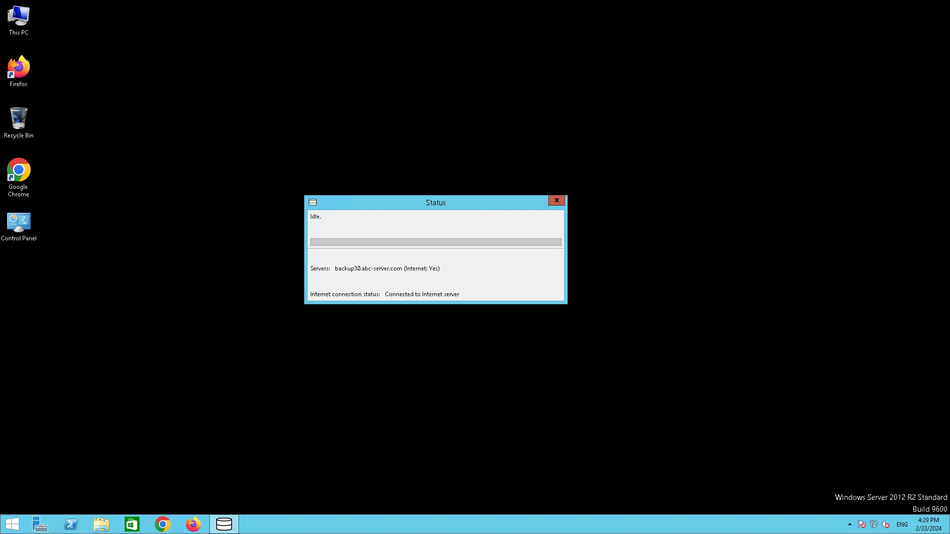
Check that we have entered everything correctly in the Client and Internet sections and click Ok. Wait for 5-10 minutes. In the Windows system tray, double-click on the Urbackup client icon to check the connection status.
Status window
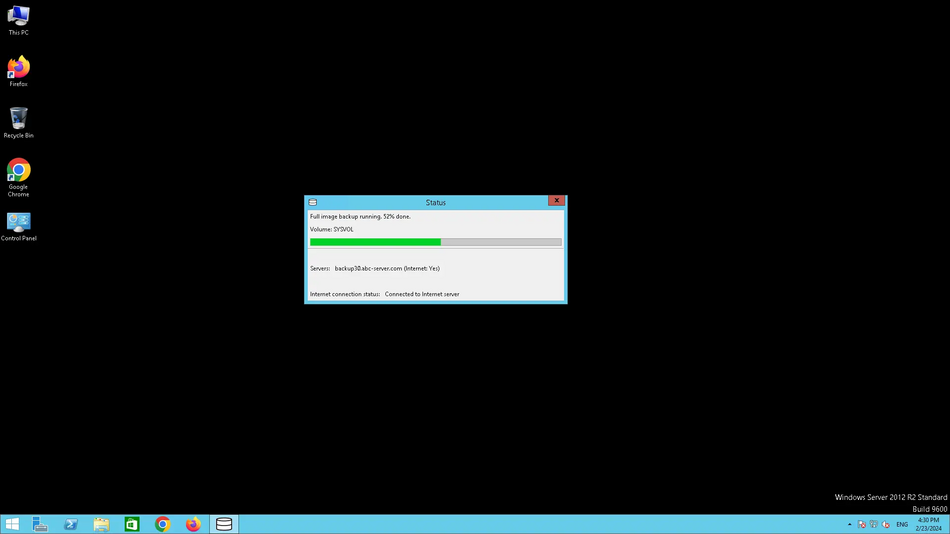
Status window when creating a full system image
4. Web interface
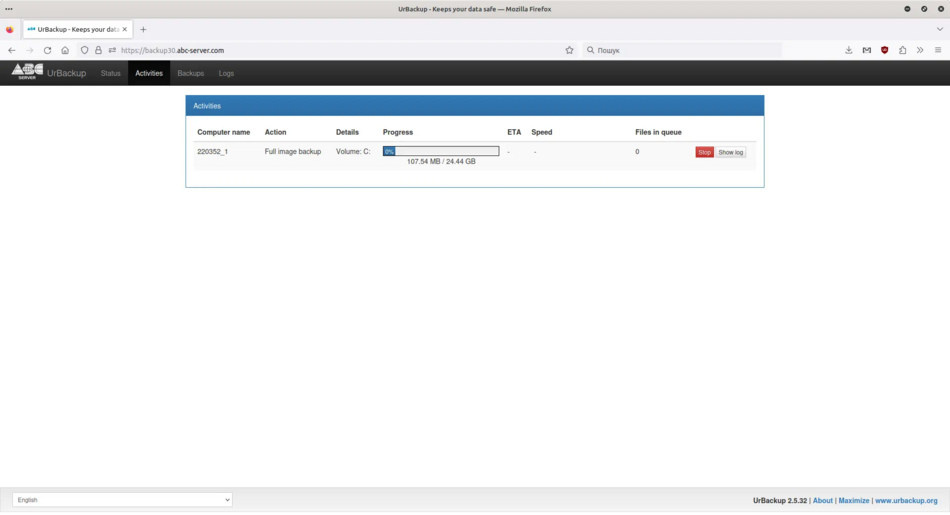
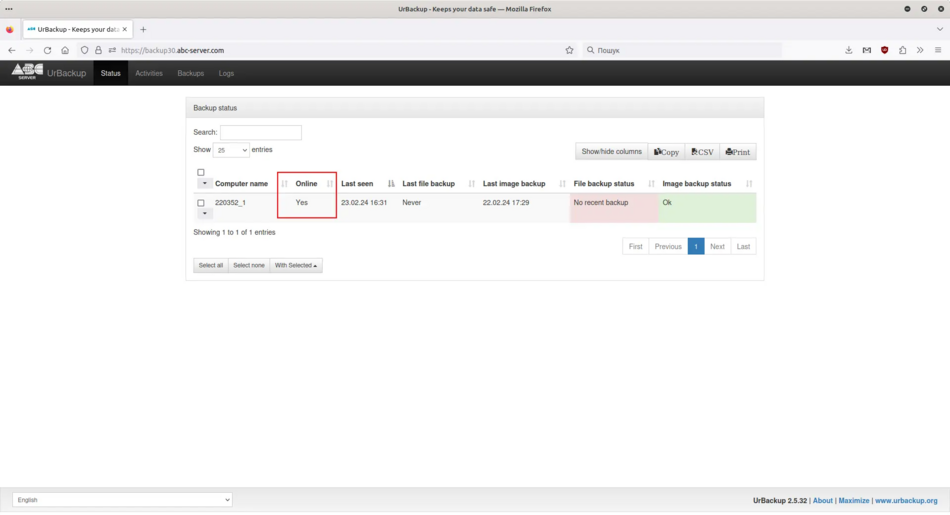
You can also access the Web interface, where you can: check the online status of your server (whether you have configured the Urbackup client correctly), start a file backup or create a C drive image, see if the backup is running now, and restore files through the Web interface. To connect to the Web interface, enter the domain name in the address bar of your browser, which you can find in the "Server" section of the email message, and you will be able to find the username and password there.
Status window
Activity window
